Extract webpage content from Chromium cache
Last updated on March 13th, 2021My host had a database outage this morning, which caused all my databases to disappear completed… needless to say, I thought I might have lost any post since my last backup.
So this post is to share how I recovered web pages from the Chromium cache, as ever post on the Internet seems to talk to Chrome, which is not the same. Hopefully this will help someone else out from an equal sized hole!
My setup
For clarity, I’m running Chromium on Ubuntu 18.10. I’m running it as a snap package, but will talk to the normal package here too, as I found the cache from my old normal package install and tested it on that too.
It’s probably the same on other Linux variants, but thought you should know my setup, for comparison to your own.
The tool
Back in the days when I used Windows, I used Nirsoft tools quite a bit, they’ve got some genuinely useful free tools. One of these I remember using is called ChromeCacheView … you point it at the cache folder and it basically gives you a file explorer, you can see details, extract details, or extract the actual files… perfect! Well, perfect, you use Chrome on Windows!
On the basis that it just reads the files, I tried in WINE… yep, it runs fine. So we just need to know where to point it now.
Chromium cache file paths
I found my Chromium cache for my snap package install to be here:
/home/james/snap/chromium/common/.cache/chromium/Default/Cache
For my convention install, my Chromium cache was here:
/home/james/.cache/chromium/Default/Cache
Detailed instructions
1. In your normal file explorer app (e.g. Files), check the paths from the section above to work the correct path to your Chromium cache files
2. Install WINE if you don’t already have it (enables you to run many Windows programs in Linux) – Just type “wine” in a terminal window if you’re not sure you have it or not. If you don’t… type “sudo apt install wine” to install it.
3. Download ChromeCacheView from Nirsoft’s website
4. Open the ZIP file you’ve downloaded, and double click on the “.exe” (Windows executable file) to run it. WINE should open it.
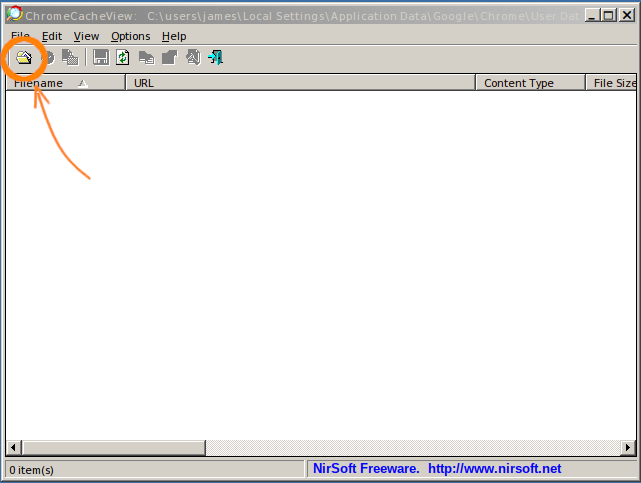
5. Click the Select Cache Folder button

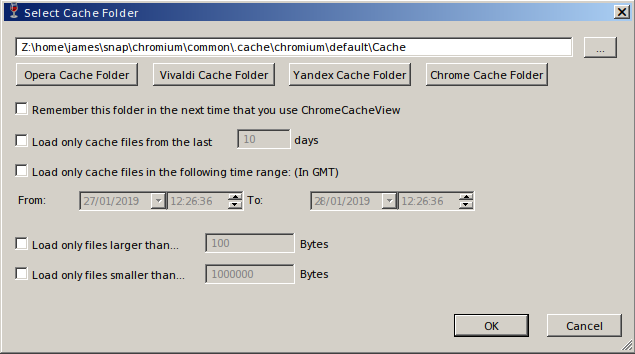
6. The path displayed will be a Windows path, you’ll need to enter the path you identified in step 1, but in Windows path format! Here’s how:
Click the “…” button to the right of the field, and select the root “/” Note the format WINE is using for your root (in my case “Z:\” is displayed when I select the root)
Windows format is to use backslashes between folders, not forward slashes, and to prefix with the root equivalent you identfied above. So my home folder would be “Z:\home\james” in Windows format.
Note: You can select part of the way in the folder tree, but the folder tree will NOT show hidden folders, so you’ll not find any folders that start “.” e.g. “.cache”. You can select up to these, select OK and then overtype the rest into the field.
You should end up converting something like this Linux path (if you have a snap install):
/home/james/snap/chromium/common/.cache/chromium/Default/Cache
to this Windows format for the field:
Z:\home\james\snap\chromium\common\.cache\chromium\Default\Cache

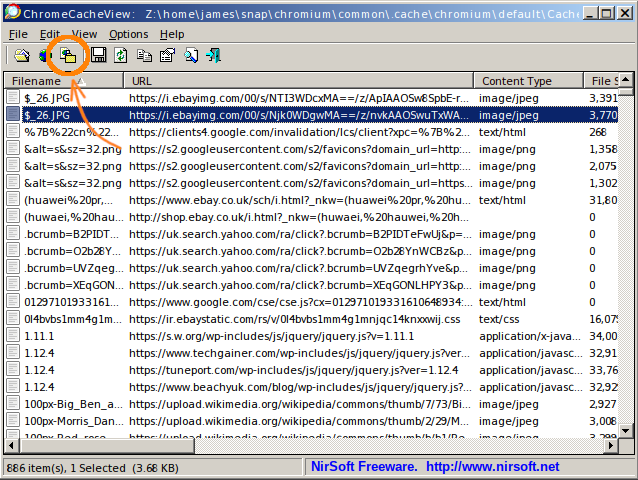
7. Select OK and you should see your cached files (it may take a moment for ChromeCacheView to find and display the list).
8. You can extract files from the cache by selecting them and selecting the Copy Selected… button. Note: this is different to the Save button, which just saves the list details.

Once extracted, you can open then in a browser or editor, to your hearts content!
I hope that helped. Please do leave a comment if it did, as it’s great to know when a post helps out.